


For Donna's class we were making what she titles Beadpod Pins.


Then made a cane to cover the smaller pods sticking out from the main pod.
Kathi and I, the two self proclaimed "caners" in the class promptly both made ours "WRONG", LOLOL.

Instead of keeping the black on one side and the white on the other, we both did ours with black on top and white on bottom, making the "design" "flat", rather than rectangular.


See, black on one side, white on the other, LOL.


Then it's cut and combined until a plug of roughly the right size is made. This is used as a veneer, not as a large piece of cane. Narrow slices are cut off of it and placed on the pod/bead.

Wires are placed in the smaller bead pods and they are cured so they are firm enough to not squish when "shoved" into the main pod.


My final 2 bead pods, not quite finished, as they still need the backs, pins, and "antiquing". Mine are also MUCH smaller than Donna makes hers, but that's just my preference.


I'm not sure who made this one, but isn't it pretty with the little extra color?
In the meantime, behind me, Randee and Joyce were creating up a storm.

Joyce was turning out these little guys right and left with her "scrap" (or as I call it, "remnant) clay. Bless her, she did a quick individual tutorial for me on how to sculpt her little peoples' faces, and it was amazing to me how quickly, with a pinch here and a pull there, suddenly there were these great little faces taking on life.

Randee was creating beads and getting out faux technique items she has made for us to oohh and aahh over. Randee will have a book on faux techniques out sometime next summer and I can't wait for it to become available.
I was especially enthralled by her "Fauxpal. Rough crystal matrix" stones.

For more examples of Randee's work, check out
her Austinsibly Art facebook page.

Before we left the Clay Carnival, Randee kindly gifted me with one of her beautiful pieces.

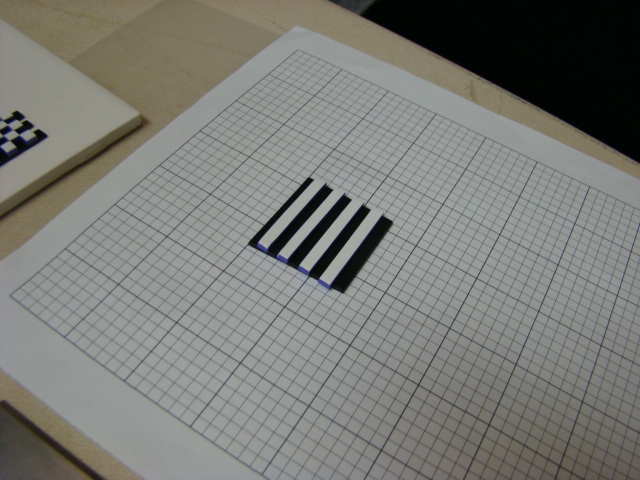
Then we took our lunch break and after lunch were greeted by Judy Belcher and her "optical illusion" earrings.
Her own description:
Magical Earrings
I love these earrings - when you look at them straight on, they appear to be a normal checkerboard, with a striped ball hanging below. But, if you tilt the earrings just slightly, they magically change in color and you can see that the ball hangs from the back of the earring. - How do you put them on????? A magician never tells the secret - but I promise I will.

And, what a great secret it was!!! I won't tell on-line, either!!! Although I will show some more pictures of the optical illusion effect.
Differing heights, differing cuts, but all based on the same technique.

This was a very tedious, but fun project. I'm still working on it 2 weeks later, LOL. It was truly fun and the effect just thrills me, for some odd, unknown reason and it's a bit addicting.

We used graph paper to form the basic design, but there were so many variables from there that there is no way to truly convey what was involved, at least in this blog.


Here's a different take, using a soda can to cure on to get the curve and having different size slices and backgrounds, as well as the cut out in the center. What fun.


 Darn, the picture doesn't do this one justice, it was done using a skinner blend rather than just one color. It was fascinating in person.
Here is a final picture showing a multi colored one as well as the dangling bead. These were great to make.
There, I managed to get through Judy's class without divulging the "secret", but it was a great idea.
Only one day to go for Clay Carnival, and then it's back to travel blogging, as currently we're in Branson, MO and I have more Albuquerque, Tulsa, and Branson to tell about. Oh, and I can't forget our nature hike in Las Vegas before we left Las Vegas. We've stayed at some great campgrounds and some not so great campgrounds, but we've sure been having fun. Smiles, check back soon. Sue C
That looks an exciting day. LY!
ReplyDelete